
- 09/06/2025in How To
FIX: Mercedes A45s AMG Error Code P089700
Fixing Mercedes A45s AMG Error Code P089700: The Real Issue Behind Transmission Oil Wear If you’ve encountered Mercedes error code P089700, your first instinct might be to assume that your transmission fluid is deteriorated and needs an urgent replacement. However, this issue is often misunderstood, leading to unnecessary repairs that could c... - 08/11/2021in How To
Mercedes A-Class W176 Water in Foot-well or Boot – FIX
Problem: Water ingress in foot-well or boot area in Mercedes A-Class W176. Applies to other models too. Fix: First you will need to go around your, at each of the jacking points remove the cover and check to see the jacking pad is present. If you find a missing one it’ll look something like this:...
FIX: Mercedes A45s AMG Error Code P089700
Fixing Mercedes A45s AMG Error Code P089700: The Real Issue Behind Transmission Oil Wear
If you’ve encountered Mercedes error code P089700, your first instinct might be to assume that your transmission fluid is deteriorated and needs an urgent replacement. However, this issue is often misunderstood, leading to unnecessary repairs that could cost thousands of pounds. In reality, the problem might not be what you think it is.
Here is a detailed video about this specific code and how to fix it.
WATCH THIS VIDEO BEFORE DOING ANYTHING!! this will save you thousands and from unnecessary repairs.
If this Video helped you then hit the subscribe button for more FREE tips and tricks.
- Published in How To
Mercedes A-Class W176 Water in Foot-well or Boot – FIX
Problem:
Water ingress in foot-well or boot area in Mercedes A-Class W176. Applies to other models too.
Fix:
First you will need to go around your, at each of the jacking points remove the cover and check to see the jacking pad is present. If you find a missing one it’ll look something like this:

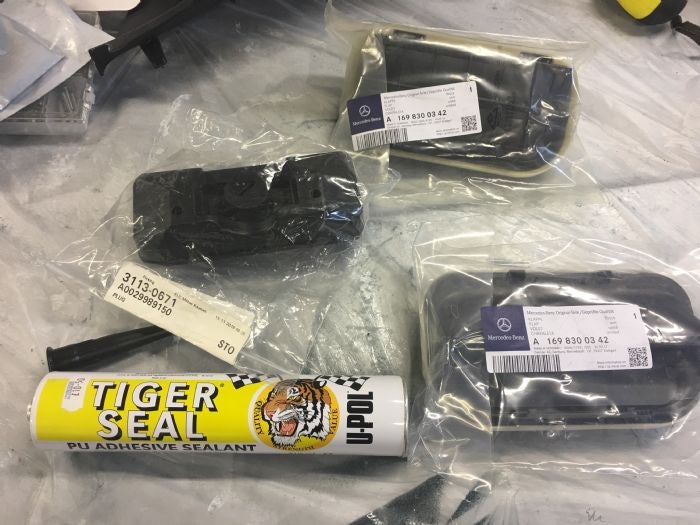
order however many you need, same one go on either the left or right.
Part Number: A002 998 91 50
Next you will need 2x rear vent covers;
Part Number: A169 830 03 42
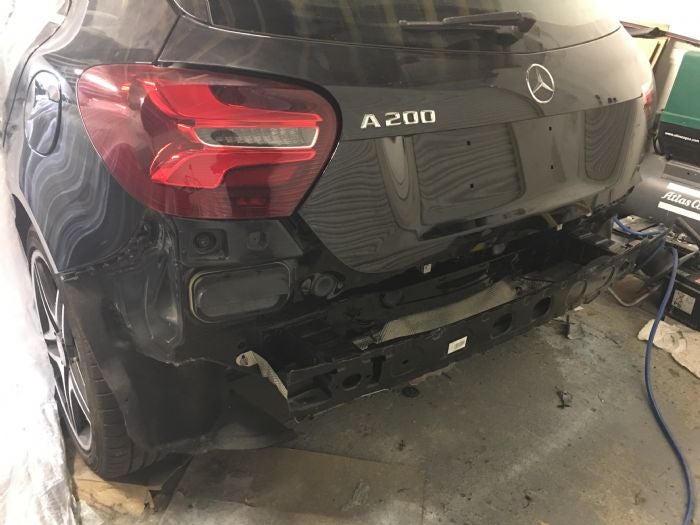
Next you will need to remove the rear bumper. this is easily done by removing the 4 bolts and multiple plastic rivets that hold it in place. there is one bolt in each of the rear wheel arches, 2 bolts under the car attached to the fire shield.
the plastic rivets are easy to remove and they are reusable so don’t throw them away. you will see them lining the edge of the wheel arch and going under the car.
Once you have removed the plastic rivets, grab one corner of the bumper and pull, there should be no tension at the bottom, only at the top. where you have to pull the bumper from it’s clips.
Once the bumper is removed, you should find yourself at this stage, with the rear vent clearly exposed:
WARNING! DO NOT TRY TO GET TO THE VENTS FROM INSIDE THE CAR!
Removal of the rear vents is easy and straight forward, start by removing the the outer trim
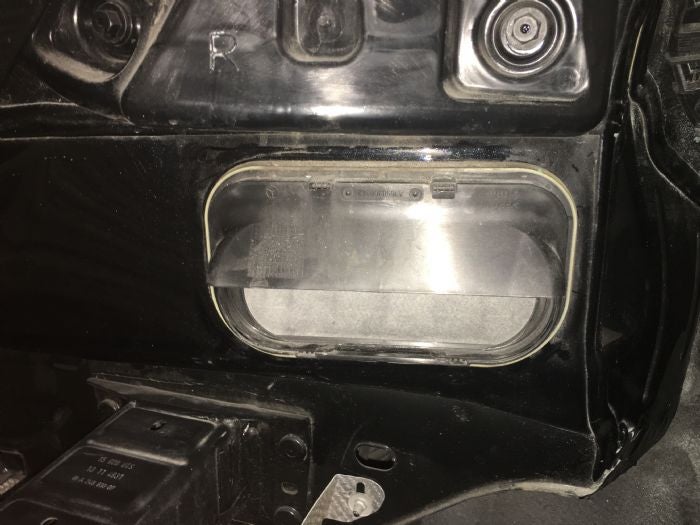
just press down on it and pull, it dose not matter if it gets broken. just get it off!
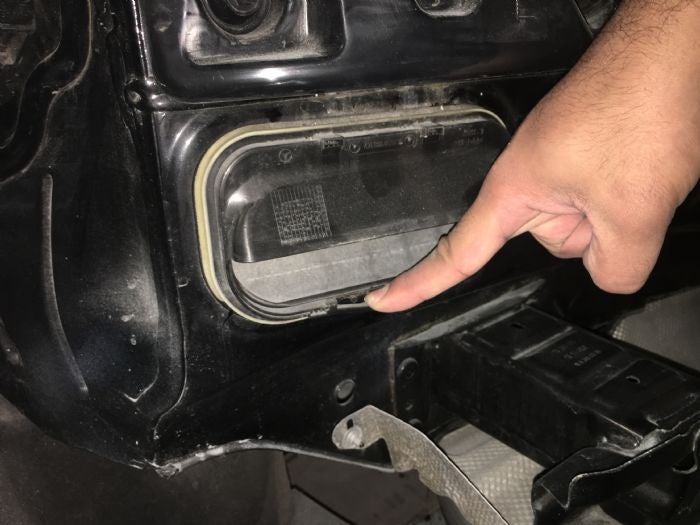
once removed its time to tackle the vent itself. grab hold of the vent and squeeze as hard as you can, it has points where it is clipped in, it should lift from bottom up.
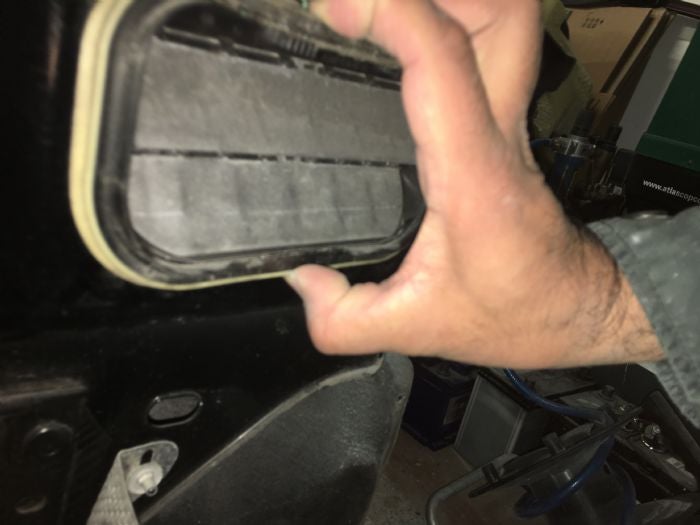
Once the vent is removed, do the same on the other side. CLEAN the surface area all around make sure it is dry and ready for the new vents.
To prep the New vents to go on the car, you are going to apply the tiger seal to the inside of the new vents.

make sure you get plenty on there. this is a case where more is better

once ready, time to install the vent onto the car. just push it in place… do the same on both sides

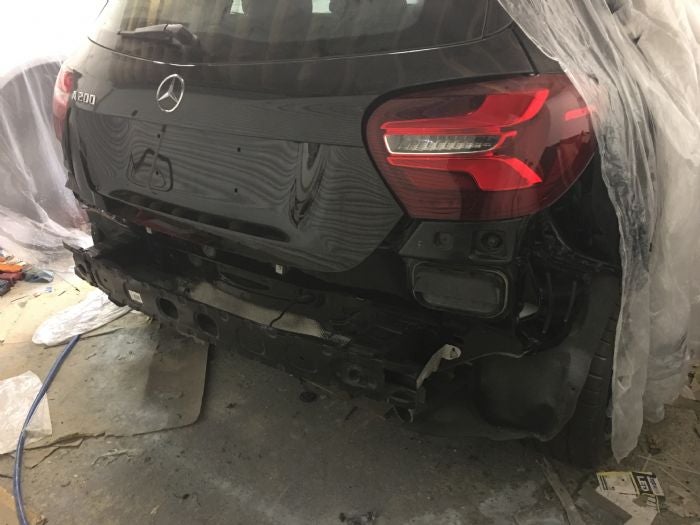
once on, you can go ahead and reattach the rear bumper, reverse steps of when you removed it.
the jacking point
apply tiger seal to the new jacking point (more is GOOD)…
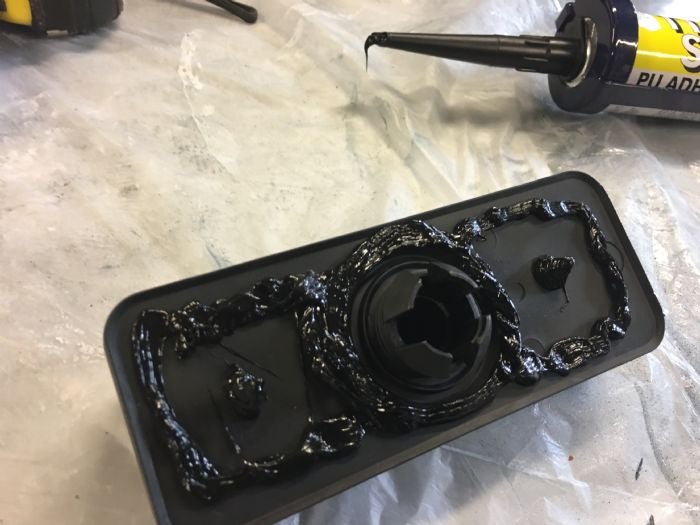
Simply push this onto the area needed, press the center in to lock it into place. job done
After this you will need to remove the carpets and dry them out.
Credit: aclassclub-xxx
- Published in How To
Range Rover Sport L494 Audio/Nav Problem
Problem:
Range Rover Sport Audio System not working / options are greyed out. Navigation doesn’t load and is stuck on initializing.
Fix:
In order to conduct a fault finding you will need some Fiber Optic loops. Once you have the loops, you will then need to bypass each module along the fiber optic line.
Fiber Optic Loop Design”Remember! If one module is faulty or has no power, there will be no light outputted to the next module. AREA OF INTEREST”.
TS (Touch Screen) -> Audio Control Unit (CD Player) -> Amplifier -> “Navigation Module; Japan ONLY” -> DAB or SIRIUS Module “US ONLY” -> “Optional Equipment; Rear Entertainment system -> Instrument Cluster -> Fiber Optic Diagnostic Port -> Back to start (TS).
Light must transmit from the TS Module through the fiber optic and back. I.e if no light is detected at the cluster then one module is faulty alone the loop.
Once the Faulty module is identified double check the power to the module. if there is good power and ground then module must have internal fault and must be replaced.
Remarks:
Replace module OR wires based on findings.
Module Locations:
TS: Main Touch Screen assembly. Dashboard.
ACM (Audio Control Module: CD Player Unit Dashboard.
Amplifier: Under the carpet – Left hand Seat.
Navigation Module JAPAN: Under the boot carpet.
DAB or SIRIUS: Under the carpet in Boot – Left hand Side.
Rear Entertainment System: Under the Carpet – Boot.
Instrument Cluster: Above the steering wheel.
- Published in How To
BMW E9X Electrical Power Loss
Problem:
Car randomly losses electrical power and turns off or while it’s parked. No light, no nothing. Battery is perfect (load tested). There is power at the jump start connectors.
Fix:
There is a design flaw in the fuse-box located in the glove-box. Essentially what BMW did is make the fuse-box connection to the battery cable a simple plastic clip, instead of a bolted down connection. When the car is driven, the battery cable gets jostled and electricity arcs between the connection, and does one of two things: fries the connection, or disconnects from the box. This can be temporarily fixed by opening the glove box, removing the fuse box cover, reaching around the back of the fuse-box on the right hand side and jostling the cable until it regains the connection. This will at least make the car temporarily drive able, but it may lose its connection again.
Remarks:
Replace Fuse-box.
- Published in How To
- 1
- 2